Baking Like a Pro: Top Tips for Mastering Your Built-In Oven

Baking Like a Pro: Top Tips for Mastering Your Built-In Oven

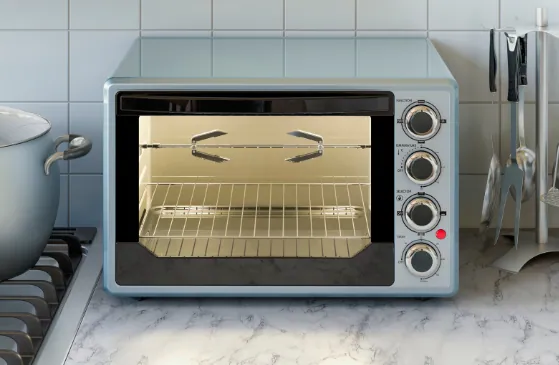
Enjoying a delicious baked good at home is possible, particularly if you have an integrated oven. These ovens give your kitchen a streamlined appearance, even heating, and constant temperatures. But achieving the finest outcomes calls for some expertise. Here are some expert pointers to help you bake like a pro and become an expert in your built-in oven!

Understand Your Oven

Each built-in oven is different. Read the handbook carefully and familiarize yourself with its features. Understand when to use each of the various settings, such as bake, broil, and convection.

Preheat Properly

Always set your oven’s temperature to the proper setting before putting food inside. This guarantees that your baked items will cook through quickly and evenly. It normally takes ten to fifteen minutes to preheat.

Use the Right Bakeware

Your baking outcomes may vary depending on the type of bakeware you use. For cookies and cakes, metal pans work well; for casseroles and pies, glass or ceramic dishes work better. Make sure the bakeware you have is high-quality and oven-safe.

Set Up Your Racks

How your food bakes might be affected by where your oven racks are placed. Your baking trays should be placed in the center of the oven for even cooking. To guarantee uniform browning when baking many items at once, turn them over halfway through.

Avoid over crowding

Make sure your meal has enough room to bake evenly. An crowded oven may result in uneven baking and lengthier baking times. If you have several things to bake, bake them in batches.

Keep It Clean

Baking is improved with a clean oven. To avoid burning and smoking, sweep up spills and crumbs on a regular basis. Not only can a dirty oven ruin food, but it can also be a fire hazard.

Use an Oven Thermometer

There are instances when oven temperatures are off. To achieve more consistent baking results, you can use an oven thermometer to make sure your oven is at the proper temperature.

Rotate Your Trays

Halfway through the cooking time, turn your trays to ensure equal baking. This guarantees that your baked items cook evenly and helps prevent hot spots.

Follow Recipes Closely

It’s all about precision when baking. Pay great attention to measures and temperatures when following recipes. Small adjustments can have a big impact on the result because baking is more of a science than an art.

Cool Properly

Before serving, allow your baked products to cool completely. This intensifies and helps them set their flavor. To avoid sogginess, chill cakes and biscuits on a wire rack.

Experiment and Practice

Practice and experimentation should not be feared. Your understanding of your built-in oven’s peculiarities and how to achieve the best outcomes will improve with continued use.

Invest in Quality Ingredients

When it comes to baking, using premium ingredients can make all the difference. Good butter, fresh eggs, and fine flour may turn your baked items from good to excellent.

It will take some practice to become an expert baker with your built-in oven, but with these pointers, you’ll be well on your way. Cheers to your baking!

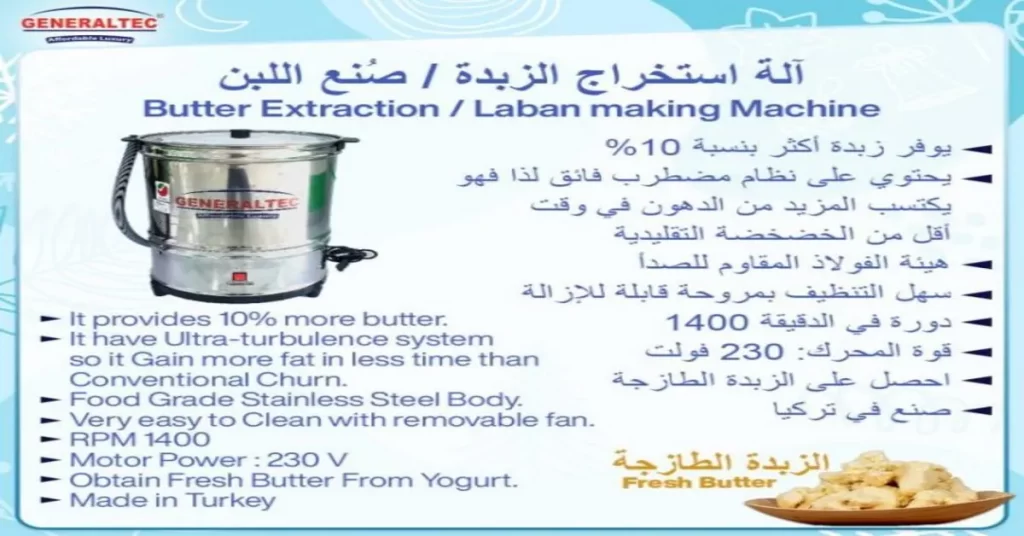
Maintaining Your Butter Maker:Tips for Longevity and Hygiene

Maintaining Your Butter Maker:Tips for Longevity and Hygiene

Making butter at home is a rewarding effort. If you give your butter maker the right care and attention, it should last you for many years. Here are a few simple steps you can take to maintain the cleanliness and optimal functionality of your butter maker.

Always Wipe 0ff After Using

Cleaning Right Away: After using your butter maker, always clean it right away. By doing this, butter and cream leftovers are kept from solidifying and becoming challenging to remove.

Use Warm Water: Use warm, soapy water to wash any removable parts.Avoid using really hot water as this can damage some components.

Gently Scrubbing: To clean the components, use a sponge or soft brush. Avoid anything that might scratch the surfaces by using an abrasive.

Thorough Rinse

Rinse Well: Make sure you completely rinse off all of the soap. The flavor of your subsequent batch of butter may be impacted by any soap residue.

Dry Completely: Let each component dry fully before putting it back together. Both bacteria and mold can thrive in an environment with moisture.

Regular Deep Cleaning

Monthly Deep Clean: It’s still advised to do a thorough clean once a month, even with routine cleaning. For around fifteen minutes, soak the detachable pieces in a solution of vinegar and water (1:1) to disinfect and get rid of any residual smells.

Examine any leftovers: In difficult-to-reach places, look for any traces of cream or butter and give them a thorough cleaning.

Proper Storage

Dry Environment: To avoid corrosion and mold, keep your butter maker stored in a dry area.

Keep it Covered: To shield the butter maker from dust and kitchen grit, store it in a cabinet or under cover whenever at all feasible.

Handle with Care

Avoid Dropping: Handle all parts carefully to avoid dropping and damaging them. Bacteria can grow in very tiny cracks.

Check for Wear and Tear: Check parts for wear and tear on an ongoing basis. To keep everything hygienic and functional, replace worn-out components as soon as possible.

Follow The Manufacturer’s Instructions

Manual Review: For detailed cleaning and maintenance advice, always consult the manufacturer’s instructions. Every butter maker could have different needs.

Use Recommended Products: To prevent breaking your butter maker, use the manufacturer’s cleaning instructions and materials.

Sanitize Regularly

Safe Sanitizer for Food: To periodically keep hazardous bacteria out of your butter maker, use a food-safe sanitizer. For optimal effects, adhere to the sanitizer’s directions.

Boiling Water: For a complete sanitizing action, periodically cover the removable components with boiling water.

Conclusion

Maintaining your butter maker involves a few simple yet essential steps that can greatly enhance its longevity and performance. Your butter maker will stay hygienic and effective if you clean it well after every use, rinse and dry all of the parts correctly, give it a monthly deep clean, store it somewhere dry and dust-free, handle it carefully, and adhere to the manufacturer’s instructions. By following these procedures, you can be sure that your butter maker will produce delicious homemade butter while also safeguarding your investment and extending the useful life of your machine.

Built In Oven Maintenance:Tips for Keeping Your Kitchen Appliances Clean

Built In Oven Maintenance:Tips for Keeping Your Kitchen Appliances Clean

Welcome to our guide on maintaining the best possible condition for your built-in oven! An essential component of every kitchen is the oven, and with proper maintenance, you can make sure it stays effective, secure, and beautiful for many years to come. Now let’s explore some professional advice on oven upkeep.

Regular Cleaning for Optimal Performance

Regular cleaning is one of the most important parts of oven maintenance. Spend a few minutes cleaning the inside of the oven with a non-abrasive cleanser or a solution of water and baking soda after every use. By doing this, you can lessen the accumulation of grease and food residue that could impair the oven’s functionality.

Don’t Forget the Door and Seals

Seals and the oven door also require maintenance. To get rid of spills and dirt, clean the door on a regular basis with a vinegar solution or mild detergent. A tight seal on the door is necessary for effective operation, therefore pay close attention to it. If you see any indications of wear or damage, replace the seal.

Maintain Clean Racks and Filters

To remove baked-on residue, remove the oven racks and soak them in warm, soapy water. Before putting them back in the oven, give them a thorough cleaning with a sponge or brush, followed by rinsing and drying. For ideal airflow, inspect and change any filters that may be present in your oven a charcoal filter, for example, should be present in a convection oven.

Exterior Surfaces and Ventilation

Wipe down the exterior surfaces of the oven, including knobs, control panels, and handles, with a damp cloth and mild detergent. Avoid getting water or cleaning solutions inside the control panels or vents. Additionally, ensure that the oven’s ventilation system is clear of obstructions and clean the vent hood or filters regularly.

Use Oven Liners for Easy Cleanup

Consider using oven liners to catch spills and drips, making cleanup easier and protecting the oven’s bottom from stubborn stains. This simple addition can save you time and effort in maintaining your oven’s cleanliness.

Avoid Overusing Self-Cleaning Cycles

While self cleaning features can be convenient, they can also put extra strain on the oven’s components. Use self cleaning cycles sparingly and follow the manufacturer’s instructions to avoid damage. Opt for manual cleaning methods whenever possible.

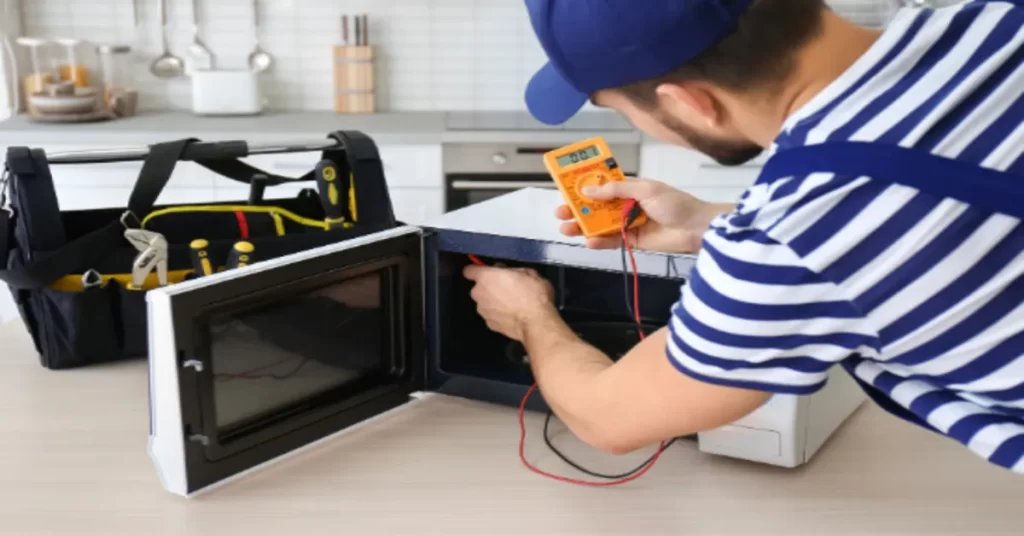
Schedule Professional Maintenance

Lastly, remember to arrange for expert maintenance as required. Speak with a trained expert if your oven seems to be having any problems or if it needs to be checked out. They can make sure your oven is running securely and effectively by spotting possible issues early on.

Last Note

Your built in oven can be kept in excellent condition by implementing routine maintenance and according to these guidelines. This will not only help it last longer, but it will also guarantee that cooking will always be pleasurable and hassle-free.

Food Processor Maintenance:Keeping Your Appliance in Top Working Condition

Food Processor Maintenance:Keeping Your Appliance in Top Working Conditions

Keeping your home’s appliances in excellent working order is important to keeping it clean and useful. Since appliances are seen as investments in a home, cleaning and upkeep are crucial for homeowners.When cooking meals, a food processor is a useful kitchen tool that may help you save time and effort. It can easily perform a wide range of activities, from slicing and chopping to pureeing and mixing.

On the other hand, routine appliance maintenance and cleaning not only guarantees peak performance but also lengthens the appliances’ lifespan, ultimately saving you money. We’ll go over the best practices for maintaining and cleaning appliances in this extensive guide, which will help you make your house healthier and more functional.

Cleaning After Each Usage

Giving your food processor a thorough cleaning after each usage is one of the most important maintenance activities. This entails taking apart every component, including the pusher, cover, bowl, and blades, and giving them a warm, soapy wash. To get rid of any food residue on the blades or in cracks, use a brush or sponge. Before putting the appliance back together, be sure that every component has dried fully.

Sharpening Blades

A food processor’s ability to function effectively depends on its having sharp blades. Regular use can cause blades to dull over time. Think about frequently improving the blades to preserve their sharpness. You can use a knife sharpener made especially for food processor blades or a sharpening stone. To ensure safe and efficient sharpening, follow to the manufacturer’s instructions.

Lubricating Moving Parts

It’s important to lubricate your food processor’s moving parts to guarantee silent, smooth operation. See the user handbook to see which parts like the motor shaft or the blade assembly may need to be lubricated. To prevent food contamination, use mineral oil or food-grade lubricant sparingly.

Prevent Overloading

Keeping your food processor from being overloaded is another important maintenance advice. A manufacturer’s recommended capacity guideline should be followed. The motor and other components may be strained by overloading, which could result in early wear and tear. To avoid overloading, process big amounts of food in batches if necessary.

Store Correctly

When your food processor is not in use, it is important to store it properly to keep it safe. The equipment should be kept out of direct sunlight and dampness in a clean, dry location. To stop the growth of mold or mildew, make sure that every component is totally dry before storing. For secure and dust-free storage of the appliance, use the included storage case or a dedicated cabinet.

Regular Inspections

Perform regular inspections of your food processor to check for any signs of wear, damage, or malfunction. During operation, pay attention to any strange noises, vibrations, or overheating as these may point to underlying problems. If you see any issues, stop using the appliance right away and get repairs done by a competent expert or the manufacturer.

Conclusion

you may prolong the life of your food processor by adhering to these crucial maintenance guidelines. To guarantee the durability and best performance of your appliance, it’s important to follow these basic practices: frequent cleaning, honing of blades, lubrication of moving components, avoid overloading, appropriate storage, and routine inspections. A well-kept food processor will continue to be a useful tool in your kitchen, making it easier for you to cook delectable meals.

Overcoming ERP Implementation Challenges: A Guide for Everyone

Choosing the Perfect Oven Toaster for Your Kitchen

Are you thinking about getting a new oven toaster? It can be hard to decide with all the choices out there. But don’t worry! We’re here to help you find the perfect one for your kitchen. We’ll guide you through the options and help you figure out which oven toaster suits your needs best.

Think About Your Cooking Needs

The first thing to do when selecting an oven toaster is to think about the purposes for which you plan to use it. Do you plan to use it for baking and roasting in addition to toasting and reheating leftovers? It will be easier to reduce your alternatives if you know what you need for cooking.

Size Is Important

Oven toasters are available in a variety of sizes, from tiny versions ideal for tiny kitchens to bigger units ideal for cooking for large gatherings. Consider your kitchen’s available space as well as the amount of countertop area you’re willing to provide your new equipment.

Features and Functions

Examine the features and capabilities that various oven toasters have to offer. Some have several cooking modes, like toast, broil, and bake, while others could have extra capabilities like rotisserie or convection cooking. Think about the qualities that are essential to you and your cooking style.

Accessibility

No one enjoys having to fight to operate a complex equipment. Seek for an oven toaster with simple, easy-to-read settings and controls. You’ll love cooking much more when the design is user-friendly.

Cleaning and Maintenance

Maintaining the cleanliness of your oven toaster is critical to its longevity and hygienic conditions. To ensure easy cleaning and upkeep, look for models with removable crumb trays and non-stick interiors.

Energy Efficiency

It’s critical to take into account the energy efficiency of your appliances in light of growing energy expenses and environmental concerns. To save money and energy over time, look for oven toasters with good energy efficiency ratings.

Budget Considerations

Since oven toasters are available at a variety of pricing points, it’s critical to establish a spending limit before you go shopping. Even though it can be tempting to choose the least expensive model, keep in mind that higher-end models may perform better and last longer, which could save you money over time.

Read Reviews

Invest some time to read other customers reviews before making your ultimate choice. To make sure you’re making an informed decision, pay attention to comments regarding performance, dependability, and customer service.It’s important to read other customers’ reviews since they offer firsthand information on the functionality, dependability, and customer support of the oven toaster you’re thinking about buying. Pay attention to comments on how well the toaster works, if it lasts a long time without breaking down often, and how helpful and quick the manufacturer’s customer care is will help you make a more informed decision before making a purchase.

Summary

Selecting an oven toaster that is ideal for your kitchen doesn’t have to be difficult. It all comes down to considering your needs and what will be most effective for you. Consider factors including the amount of room you have, the type of cooking you’ll be performing, and the ease of cleaning. Take into account whether it fits within your budget and is energy efficient. You can get a fair idea of what to expect by reading reviews left by other users of the toaster. You’ll be able to select the ideal oven toaster for you once you’ve considered all of these factors.

Microwave Oven Safety: Best Practices for Heating and Cooking

Microwave Oven Safety: Best Practices for Heating and Cooking

Introduction:

Because they provide effective and simple heating and cooking, microwave ovens have become an essential component of modern kitchens. Despite their widespread use, safety must always come first in order to avoid accidents and extend the life of your device. We’ll look at some best practices for microwave oven safety in this blog post.

Read the User Manual

Start by carefully reading the microwave oven’s user manual that came with it. There may be particular rules and safety recommendations for different models. Safe usage begins with understanding the manufacturer’s advice.

Use Microwave-Safe Containers

Always use microwave-safe containers when preparing or heating food in a microwave. Aluminum foil and other metallic containers should not be used since they can ignite sparks and harm the oven. Go for microwave-safe plastics, glass, or ceramics.

Avoid Sealed Containers

Never heat or cook food in sealed containers, as pressure can build up and result in explosions. To let steam escape, always leave a space or utilize vented containers. This safety measure guarantees even heating and avoids mishaps.

Use Microwave Covers

These covers shield food from spills and splatters in the microwave, resulting in a more equal heating process. This helps to keep the food’s flavor and texture intact while also maintaining the overall quality of the cooked meal and keeping the interior of the microwave clean. Microwave covers minimize spills and simplify cleanup after cooking by absorbing steam and moisture.

Check for Leaks

Make sure your microwave’s door seal is intact and that there are no leaks visible. A microwave that is correctly sealed keeps dangerous radiation from escaping, guaranteeing a secure cooking environment. It’s important to get the appliance examined and fixed right away if you discover any problems.

Observe Suggested Cooking Times

It’s important to follow suggested cooking times to prevent overcooking or undercooking your food. This reduces the possibility of overheating, which could result in fires or other safety risks, in addition to guaranteeing the best taste and texture.

Use Microwave-Safe Utensils

Use utensils that are safe to use in the microwave while mixing or handling hot food. Metal utensils should be avoided in favor of wooden or plastic ones since they conduct heat poorly and increase the chance of burns or oven damage.

Supervise Children

Keep a close eye on children when they are using the microwave. Inform them of the possible risks and make sure they follow the safety regulations. Young children should not be allowed to use it alone.

Routine Maintenance

Check your microwave often for indications of wear, damage, or malfunction. Frequent interior cleaning will help to get rid of trash and food splatters. Seek advice from the manufacturer or refer to the user manual if you find any problems.

Stay Informed

Stay informed about any recalls, updates, or safety features related to your microwave model. Important information may be made public by manufacturers in order to enhance the safety of their goods.

Conclusion

Although microwave ovens are useful kitchen appliances, it is crucial to use them safely. You can make cooking safer, extend the life of your equipment, and responsibly take advantage of the convenience that microwave ovens provide by following these best practices. To create a safe and effective cooking environment for you and your family, safety should always come first.

Cooking Hob Types: Gas, Electric, and Induction:Finding Your Perfect Match in the Kitchen

Cooking Hob Types: Gas, Electric, and Induction:Finding Your Perfect Match in the Kitchen

Introduction

Welcome to the heart of your kitchen the cooking hob Your cooking experience can be greatly enhanced by selecting the correct hob. The three primary types of hobs gas, electric, and induction will be discussed in this blog. Let’s explore and see which one would be the best suited for your cooking explorations. Each has its advantages and characteristics.

Gas Hobs: The Timeless Option

Characteristics:

Gas cooktops are similar to the trustworthy, long-time kitchen buddy. For many chefs, they are the best option since they provide accurate control and quick heat.

Pros:

Rapid heating, adjustable flame visibility, compatibility with a range of cookware, and frequently more economical.

Cons:

Grates and burners may be more difficult to clean, and they may not be as energy-efficient as some more recent alternatives.

Electric Hobs: Smooth and Steady

Characteristics:

The cool-headed and collected members of the kitchen family are the electric hobs. They are a popular option for many homes since they are simple to clean and consistently deliver heat.

Pros:

Even heat distribution, a smooth surface that’s easy to clean, and certain versions with extra features like safety controls and quick heating.

Cons:

The heat intensity may be a little harder to control and it takes longer to heat up and cool down than gas.

Induction Hobs: Modern technology

Personality:

Induction hobs are like the tech-savvy superheroes of the kitchen. They offer speed and efficiency by directly heating your cookware using magnetic fields.

Pros:

Safer choice because the surface stays cool, is energy-efficient, easy to clean, and instantaneous and accurate heat management.

Cons:

May be more expensive initially, requires special cookware that is compatible with induction, and may make a soft humming sound when in use.

Making the Right Choice

How do you choose your kitchen sweetheart now that you’ve met the contenders? Take into account these elements:

Cooking Style:

If you enjoy making quick adjustments and are drawn to the visual appeal of flames, the gas hob could be the perfect fit for you. It offers both the classic experience of cooking over an open flame and instantaneous heat control.For those who want a cooking surface that is easy to clean and offers even heat distribution, the electric hob may be the best option. Its flat surface guarantees even cooking, and cleaning it up after use is a breeze.The induction hob may win your heart if you’re looking for a high-tech and energy-efficient cooking experience. Its cutting-edge technology offers quick heating, accurate control, and an extra safe cool-to-the-touch surface.

Budget:

The gas hob is frequently more economical to use, both initially and in terms of continuous running expenses if you’re on a tight budget.The electric cooktop is reasonably priced and provides a good mix of functionality and cost. Think about the upfront costs and the long-term savings.For those who can afford to pay a somewhat higher price upfront for cutting-edge technology and possible energy savings, the induction hob may be a wise option. If you’re searching for a high-tech, energy-efficient cooking experience, the induction hob might win you over. Innovative technology provides extremely safe cool-to-the-touch surface, precise control, and rapid heating.

Kitchen Safety:

The induction hob is an exceptional option if safety is your primary concern, particularly if there are little children present. Because of its cool-to-the-touch surface, which lowers the chance of burns, this is a safe choice for families.

Although electric hobs include safety safeguards, one should exercise caution because the surface can remain hot after cooking. Make sure you’ve implemented the right safety precautions.Although they are usually safe, gas hobs require careful handling and ventilation because they have an open flame. Maintaining safety procedures is essential to reducing risks.

Cookware Compatibility:

For people who already own a variety of pots and pans, gas hobs are a useful option due to their versatility and compatibility with different types of cookware.Cookware with a flat bottom fits quite nicely on electric hobs. Make sure the kitchenware you currently own fits, or be ready to spend money on matching pots and pans.Cookware designed for induction hobs must have a magnetic base. Consider the extra expense if you don’t currently own cookware that is compatible with induction.

Conclusion

When picking your kitchen buddy, think about how you like to cook, how much you want to spend, what you want in the long run, and how safe it is. Each kind of stove has its own good and not-so-good things. Whether you like the old-fashioned gas stove, the simple electric one, or the cool induction stove, your perfect kitchen friend is there to make your cooking better.

Boil and Beyond:Innovative Kettle Recipes for Home Cooks

Boil and Beyond:Innovative Kettle Recipes for Home Cooks

Kettle Cooking: Beyond Boiling

Boiling water for a quick cup of tea or coffee is the first thing that comes to mind when we think about kettles. But your reliable kettle can be a useful kitchen assistant beyond its main use. In this blog post, we’ll look at some creative ways to use your kettle in the kitchen so you can use it for more than just boiling water.

Hard-Boiled Eggs

One time-saving tip for making flawless hard-boiled eggs is to use your kettle. Just put your eggs in a steamer basket, fill the kettle with water, and then use the steam setting on your kettle to steam them. Compared to ordinary boiling, this method cooks eggs more quickly and yields reliably cooked eggs with easily peeled shells.

Pasta and Instant Noodles

If you’re short on time or space in your kitchen, boiling pasta or instant noodles in your kettle is a quick and easy solution. Fill the kettle with water, bring it to a boil, and then pour the boiling water over your pasta or noodles in a heat-resistant bowl. Once the noodles are cooked through, cover the bowl and leave it alone for a few minutes.

Porridge and Oatmeal

Prepare a real breakfast in your kettle to start your day. Pour water into the kettle, add the rolled oats, and add your preferred toppings. Cook until the oats are tender, and the mixture thickens. This way guarantees a hassle-free, speedy breakfast—especially on hectic mornings.

Soup & Broth

As a quicker option to stovetop cooking, make a tasty soup or broth in your kettle. Bring the water kettle to a boil and add your preferred soup ingredients, including noodles, veggies, and seasonings. Simmer for a few minutes to allow the flavours to combine and create a deliciously hot soup.

Rice and Quinoa

One effective method to expedite meal preparation is to cook rice or quinoa in a kettle. Combine rice, water, and a small amount of salt in a kettle. Simmer until the grains are perfectly cooked. Those who wish to preserve energy or don’t have access to a stove may find this method extremely helpful.

Mulled beverages

Make mulled beverages to turn your kettle into a beverage infuser. Put some spices in the kettle, such as cloves, cinnamon, and slices of citrus, and bring it to a simmer. This aromatic mixture can be the foundation for a festive non-alcoholic punch, mulled wine, or cider.

In summary

Beyond boiling water, your kettle may prepare a wide range of dishes; it’s not just a one-trick pony. These inventive cooking uses for your kettle, which range from tasty soups and healthy grains to quick and simple breakfast options, will completely transform your cooking routine. Try these recipes to get the most out of this overlooked culinary tool and improve your cooking abilities.

A Guide to Choosing the Perfect Food Processor: Features and Considerations

A Guide to Choosing the Perfect Food Processor: Features and Considerations

Choosing the Perfect Food Processor

A food processor is a multipurpose kitchen tool that helps expedite the process of chopping, slicing, shredding, and other common operations. When processing big amounts, using food processors for these repetitive chores can save a significant amount of time and energy. Additionally, some food processors come with specialised equipment for kneading homemade dough.

These kitchen appliances not only save a tonne of time, but they can be used rather safely. For example, there’s no chance of cutting your finger when chopping veggies. Having a high-quality food processor in your kitchen encourages you to prepare inventive, healthful, and engaging meals.There are a few important considerations and features to look for in a food processor. A food processor should be carefully chosen after thorough planning and evaluation of all the aspects that contribute to a high-quality result.Prioritising your needs will help you choose which features are most important to you and buy a machine that will fulfil them.

Capacity Matters

Take your household’s size and cooking preferences into account before choosing a food processor. While bigger families or individuals who entertain frequently would choose a 10-cup or larger model, smaller households might find a 3 to 5-cup capacity suitable.

Power Up the Motor

The motor is the heart of a food processor, influencing its ability to handle various tasks. For basic activities, look for a machine with at least 600 watts; however, a more powerful motor can be needed for larger duties like kneading dough. Dependability and efficiency are guaranteed by a strong motor.

Cleaning Ease

Choose a food processor with dishwasher-safe parts to avoid having to deal with messy kitchen cleanups. Smooth surfaces and detachable parts allow for simple and quick cleanup after every use.

Size and Storage Options

Take into account the space in your kitchen that is available. Choose a food processor that can be stored in your closet or on your countertop. Certain models feature unique designs that enable the compact storage of attachments.

Safety First

Safety features are crucial. Seek for versions that have strong locking mechanisms to stop the CPU from working if it isn’t put together correctly. This guarantees a safe cooking atmosphere.

Reputation and Reviews

Look through customer comments and reviews from reliable sources. Food processors from brands with a good reputation and happy customers are more likely to be dependable and effective.

Assurance Regarding Warranty

Verify the manufacturer’s warranty. An extended warranty duration frequently signifies the manufacturer’s faith in the robustness and functionality of the device.

Budget considerations

Establish your spending limit and look for a food processor that fits inside that range while still providing the functions you require. Numerous dependable solutions meet a range of financial limitations.

Conclusion

Purchasing a food processor can revolutionize your cooking experience by increasing the effectiveness and enjoyment of meal preparation. You may select a food processor with confidence that suits your needs and cooking tastes by taking into account elements like capacity, motor power, accessories, and safety features. You should have no trouble choosing the ideal kitchen partner if you keep these things in mind. Have fun in the kitchen!

Selecting the Ideal Vacuum Cleaner to Suit Your Home Cleaning Needs

Selecting the Ideal Vacuum Cleaner to Suit Your Home Cleaning Needs

It might be difficult to determine which vacuum cleaner best suits your needs because there are so many different models available. This post will explain how vacuums operate, provide you with a list of possibilities, and show you how to narrow down your search to identify the best vacuum cleaners for your needs and your house. The first step in keeping your home healthy and clean is selecting the ideal Hoover cleaner. It might not be easy to choose the best hoover for your needs with the wide range of alternatives on the market. 

Identify Your Cleaning Needs 

Examine your cleaning requirements before delving into the Hoover industry. Think about the kind of flooring you have, whether you have pets and any particular cleaning difficulties you encounter. This will help you select a hoover that suits your particular needs.

Vacuum Cleaner Types

 Recognise the several kinds of vacuums that are out there, including stick, canister, upright, and robotic models. Select the type that best fits your cleaning tastes and lifestyle, as each has pros and cons of its own.

Compatibility of Flooring Types

Vacuum cleaners perform differently on various types of surfaces. Whether you have tile, hardwood, carpets or a mix of various types of flooring, be sure the hoover you select is appropriate for the job.

Bagged vs. Bagless

Consider the pros and cons of bagged and bagless vacuum cleaners. While bagless devices reduce continuing costs, bagged variants are typically more hygienic when disposed of. Select the option that best suits your tastes.

Power and Suction

Recognise the various models’ power ratings and suction capacities. A high wattage does not always translate into improved performance, but having enough suction force is necessary for efficient cleaning.

Attachments & Accessories

Examine the many accessories and attachments that are offered. Your vacuum’s versatility can be increased with a range of tools, giving you the ability to clean a variety of surfaces and fit into confined spaces.

Weight and Maneuvrability

Take into account the vacuum’s weight and manoeuvrability, especially if you need to clean confined spaces or several floors. Using a lightweight, portable hoover can improve the effectiveness of your cleaning regimen.

Noise Level

Examine the noise levels of several models if noise is an issue. A quieter cleaning experience is guaranteed by the design of certain Hoover cleaners.

Cord Length and Storage

Make sure a corded hoover can reach all the locations you need to clean by measuring its length. For easy storage, look for models with retractable cords.

Brand Reputation and User Reviews

To learn more about the performance and robustness of the Hoover cleaner you’re considering, look up the reputation of several brands and read user reviews.

Warranty and Customer Service

Verify the manufacturer’s warranty and customer service provisions. In the event of any problems, having a trustworthy guarantee and attentive customer service can provide you peace of mind.

In summary

Selecting the best Hoover cleaner requires carefully weighing the features of several models, user experiences, and your demands. You’ll be well-equipped to make an intelligent choice and ensure a healthier and cleaner house for you and your family if you adhere to these thorough instructions.